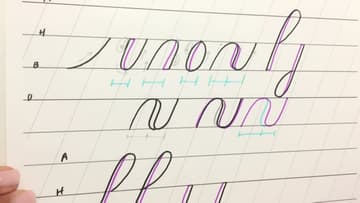
How to Do Faux Calligraphy
Source: Loveleigh Loops | Calligraphy & iPad Lettering • Full tutorial: www.craftingstepbystep.com/calligraphy/how-to-do-faux-calligraphy
- Difficulty
- Easy
- Hands-on time
- About 45 minutes
- Cost
- About $8 to $15

Tools
- fineliner or monoline pen
- pencil
- ruler
Materials
- lined practice paper
- calligraphy guide sheet
- coloured pens or pencils
Steps
1. Get Onto Lined Paper
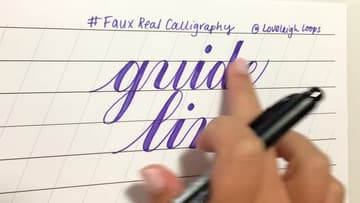
Work on paper with lines. You need a baseline for the letters to sit on and a header line for the x-height to reach, and slanted lines help you keep a consistent angle across the whole word.
Tip: Slip a printed guide sheet under a sheet of lightweight paper if you want the lines to help you without showing up in the finished piece. Watch this step
2. Pick Any Monoline Pen
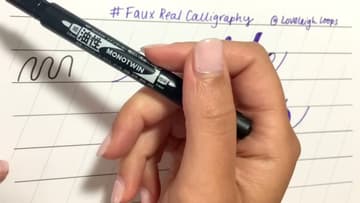
Monoline just means the line does not change width no matter how you push the pen. A fineliner, a gel pen, a pencil, a ballpoint from the kitchen drawer.
Tip: Avoid brush pens for this. They change width on their own and fight the technique you are trying to learn. Watch this step
3. Draw the Entrance Stroke
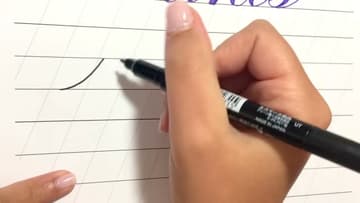
The first shape is the easiest: a thin line curving upward from the baseline. It is the little lead-in that starts most lowercase letters and joins one letter to the next.
Tip: Keep the whole shape between the baseline and the header line, following the slant. Consistent slant is what makes a word look deliberate. Watch this step
4. Add the Underturn, Overturn and Oval
Three more shapes. The underturn is a U that starts at the header line, dips to the baseline and comes back up.
Tip: Always draw the oval the same way round, starting at the top and going anticlockwise. Consistency here means the shade always lands on the same side. Watch this step
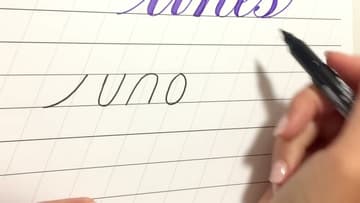
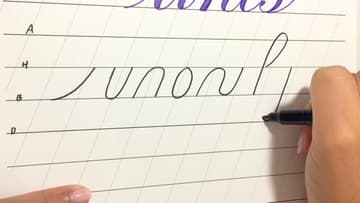
5. Finish With the Compound Curve and Two Stem Loops
The compound curve is an underturn running straight into an overturn, which is what the middle of an n or an m is made of. Then the two loops: an ascending loop that climbs above the header line, and a descending loop that drops below the baseline.
Tip: The ascending loop starts at the header line, goes up, loops around and cuts back down. Starting it from the baseline gives you an oddly tall, thin loop. Watch this step
6. Thicken Only the Downstrokes
Here is the whole technique in one line. Go back over each shape and add weight to any part of it where the pen travelled downward.
Tip: If you cannot remember which way a stroke went, redraw it slowly and watch your hand. The answer is always in the direction, never in the shape. Watch this step
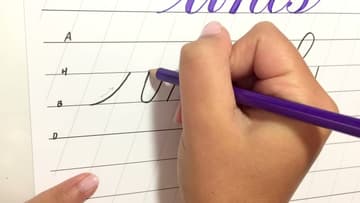
7. Add the Weight on the Inside
This is where most people go wrong. Add the thickness on the inside of the shape, running along the existing downstroke, so the outside edge of the letter does not move.
Tip: Outline the thick section first, then fill it in. Trying to freehand a thick stroke in one pass gives you a lumpy edge. Watch this step
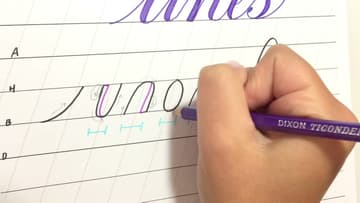
8. Keep Every Shade the Same Width
All the thick sections in a word should be the same weight as each other. This is easy on a single shape and surprisingly hard across a whole word, so check it as you go.
Tip: If you are going to fill your letters in solid at the end, none of this matters much. It only shows when you leave the thick sections hollow or patterned. Watch this step
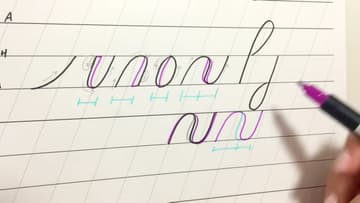
9. Leave a Gap Where the Loops Close
On both stem loops, stop the returning line just short of where it would meet the loop. That small gap gives the shade somewhere to go without a hard line running through the middle of the loop.
Tip: On a descending loop it is often easier to draw the inside line first, loop around, and add the shade on the outside instead. Watch this step
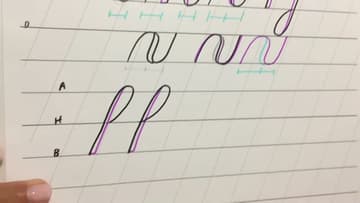
10. Drill the Shapes Until They Are Automatic
Fill a page with the seven shapes, then another. Every letter in the alphabet is these shapes joined together, so time spent here is not practice for the real thing, it is the real thing.
Tip: Date the corner of each practice page and keep them. A month of pages side by side is the most encouraging thing you will see. Watch this step